How to Press Flowers Perfectly
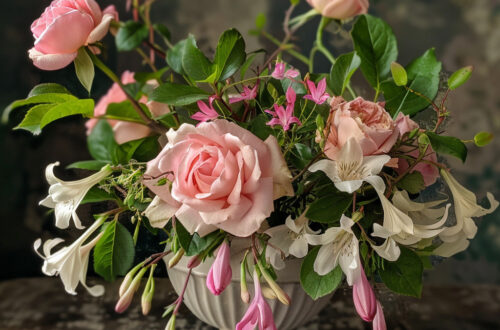
Have you ever found a flower so beautiful you wished it could last forever? Learn how to press flowers to keep their colors and petals bright. If you love doing crafts or want to start, our guide is perfect for you. It will show you how to press flowers step by step at home.
Let me share a story. Last summer, our daughter Emily visited a garden full of colorful flowers. She was amazed by nature’s beauty and felt inspired to keep the memory of those flowers alive forever.
Emily started learning how to press flowers. She tried pressing them in books, using a DIY flower press and even the microwave! After some trial and error, she found the best methods to save the flowers’ beauty.
Now Emily wants to pass on her knowledge for all of us to enjoy the beauty of pressed flowers.
Key Takeaways:
- Learn how to press flowers step-by-step, using different techniques such as book pressing, DIY flower presses, microwave pressing, and iron pressing.
- Select the best flowers for pressing, ensuring they are close to full bloom, free of blemishes or dark spots, and completely dry.
- Discover the optimal methods for pressing flowers and the best practices to achieve stunning and long-lasting results.
- Explore various creative uses for dried flowers, including pressed flower art, greeting cards, home décor, and more.
- Unleash your creativity and embark on a journey to preserve the beauty of flowers through pressing.
Picking the Best Flowers for Pressing
Before starting your flower pressing project, you need to select the right flowers. The flowers you choose will affect the outcome greatly. Here’s what to keep in mind when picking flowers to press:
Choosing the Best Flowers
Choose flowers that are almost fully bloomed. They will keep their bright colors and details well. Avoid flowers with any blemishes or decay. These issues might get worse when you press them.
Morning Harvest
It’s best to pick flowers in the morning, after the dew is gone. They will be fresher and less likely to wilt. Picking in the morning also helps avoid adding moisture to the press.
Dryness is Key
Make sure your flowers are completely dry before you press them. Wet flowers can develop mold. To dry them, leave the flowers in a dry, airy area. If you’re pressing a bouquet, keep it in water until you’re ready to press.
Handling Layered Petals
If you’re pressing flowers with layers, like roses, separate their petals. It helps with pressing and allows you to reconstruct the flower later if you want.
Flowers to Avoid
Not all flowers press well. Flowers with thick, fleshy petals like succulents or orchids may not be the best choice. Stick to flowers with finer, dryer petals for better results.
| Best Flowers for Pressing | Flowers to Avoid |
|---|---|
| Roses | Succulents |
| Daisies | Orchids |
| Lavender | Sunflowers |
| Violets | Geraniums |
| Pansies | Tulips |
Using these tips will help you choose the best flowers for pressing. This will lead to better and more successful results in your project.
Pressing Flowers in a Book
Pressing flowers in a book is an old and proven way to keep their beauty. It’s easy to do, needing just a book and some waiting time. Let’s go through how to press flowers using the pages of a book.
First, you need these items:
- A sturdy book, such as a phone book or an old hardcover book.
- Parchment paper or blotting paper.
- Space to allow proper drying of the flowers.
- A weight, such as another heavy book or a brick.
Now, let’s start pressing the flowers:
- Choose flowers that are fully bloomed and dry. They should also be free from any blemishes.
- Find the middle of the book. Make sure it’s a flat, clean space for the flowers.
- Put a sheet of parchment or blotting paper on that page. This paper will soak up moisture from the flowers.
- Place your flowers on the paper. Make sure they’re not touching so they don’t overlap.
- Put another sheet of paper on top to protect the flowers.
- Close the book gently to press the flowers flat between the pages.
- Top the closed book with something heavy. This will help the flowers dry flat.
- Keep the book in a quiet, dry spot where it won’t be moved.
- Wait as the flowers dry, which usually takes 2 to 4 weeks. The time can vary based on how much moisture the flowers have.
- Check on the flowers now and then. If you see mold or they’re still moist, change the absorbent paper.
After a few weeks, your flowers will be dry. Carefully take them out of the book. You’ll have flat, colorful flowers to use in art, cards, or bookmarks.
Choosing the right paper is key to this process. Parchment or blotting paper works well because it absorbs moisture from the flowers. This helps keep their soft petals safe.
This way of pressing flowers lets you enjoy their beauty for a long time. It also lets you make fun craft projects that bring nature into your home.
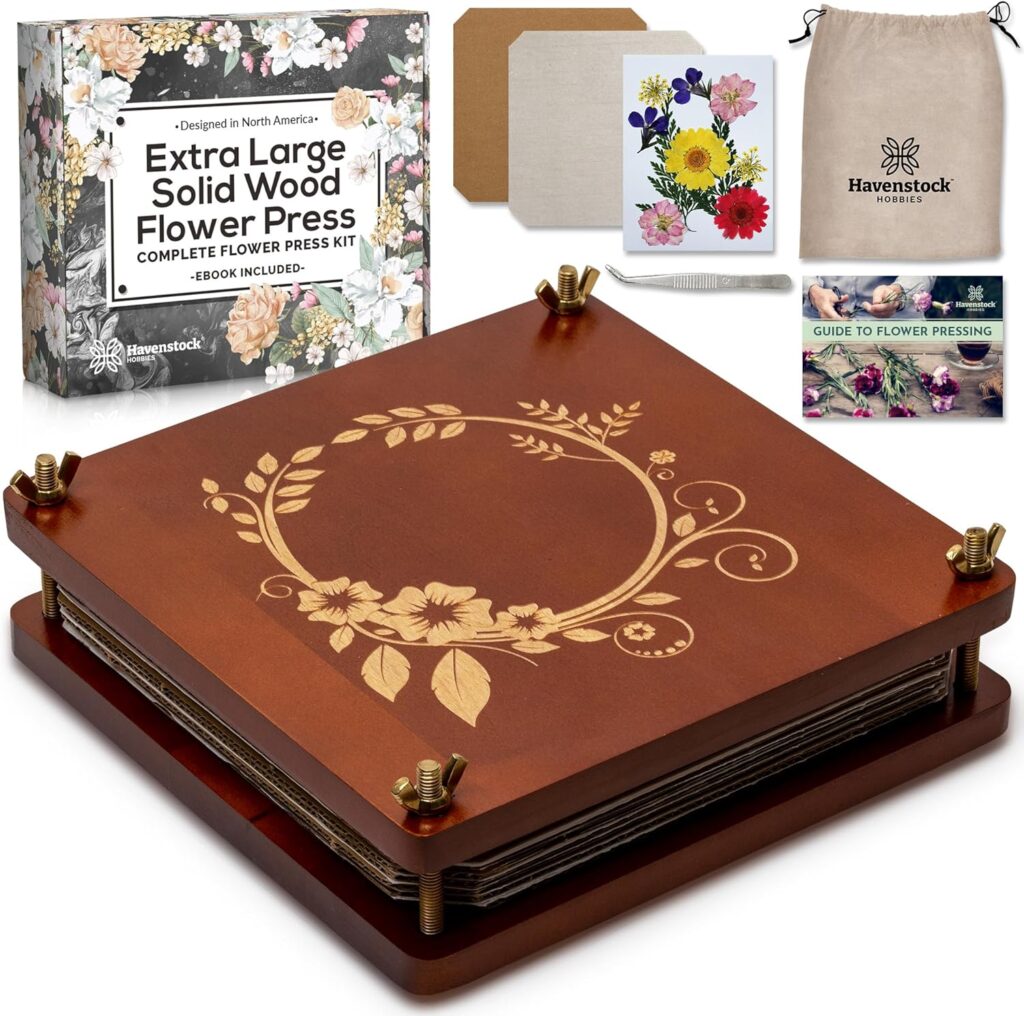
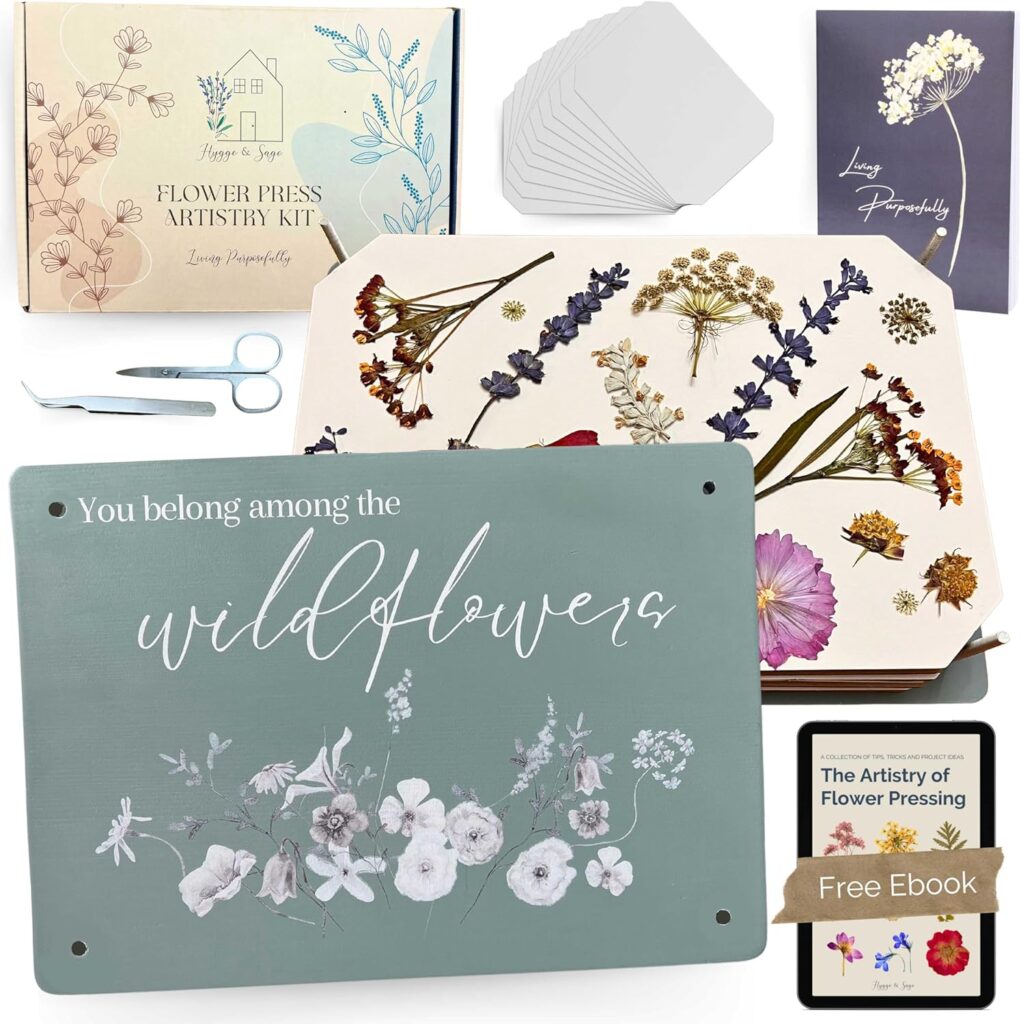
Using a DIY Flower Press
Prefer something unique for pressing flowers? Try a DIY flower press. It’s fun and lets you make it just how you want. You can use a few items to make your flower press at home.
Materials for a DIY Flower Press
To make your own flower press, gather these items:
- Two pieces of plywood or MDF boards
- Cardboard sheets
- Bolts with wingnuts
- Drill
- Parchment or blotting paper
Step-by-Step Guide for Making a Flower Press
Creating your own flower press is simple. Just follow these steps:
- Drill small holes at each corner of your boards. The holes must line up when the boards are together.
- On one board, place cardboard, then cover with parchment or blotting paper.
- Put flowers between layers, ensuring they’re not too close together.
- Add the second board on top, matching the holes.
- Use bolts to connect the boards, then tighten them with wingnuts. This makes the press firm.
- Let your flowers press for 2 to 4 weeks to fully dry.
After drying, take your flowers out. Now they’re perfect for any creative work. A DIY press gives your flowers the best preservation, lasting for years.
Looking for a pre-made press? They’re available online or in craft shops. These presses let you adjust the pressure and fit different flower sizes.
| Advantages of a DIY Flower Press | Disadvantages of a DIY Flower Press |
|---|---|
| Affordable and customizable | Requires more time and effort to assemble |
| Provides even pressure for well-preserved flowers | May not have adjustable pressure settings |
| Allows for a personal touch and unique design | Requires patience for drying period |
Pressing Flowers in the Microwave
Using a microwave flower press is a quick way to press flowers. It’s great for those who want fast results.
First, gather your flowers and put them on an inner lining like fabric or parchment paper. This will protect them. It also stops them from sticking to the press. Make sure to space the flowers out for even drying.
Microwaving your flowers comes next. Zap them in short bursts, like 20 seconds at a time. After each round, lightly touch the flowers to check their dryness. Be careful not to let the flowers stick to the fabric.
Keep microwaving in short bursts. Check their dryness each time. You want the flowers to be thin like paper. This could take several rounds of microwaving, based on the flower type.
When your flowers are dry and thin, take them out carefully. Flowers are fragile, so handle them gently. Now, you’ve got pressed flowers for crafts or to admire.
The microwave method is much faster than usual. Still, the drying time depends on flower types and microwave power. But, it’s a quick and easy way to get pretty pressed flowers.
How to Iron Flowers
Looking for a quick way to press flowers? An iron can work well. It’s not common, but if done right, it can make flowers last.
To start, put the flowers in absorbent paper. Parchment or blotting paper works best for this. It absorbs moisture and protects the flowers while ironing.
Next, gently press the iron over the paper with flowers inside. Use the lowest heat setting possible. You don’t want to damage those pretty petals. Hold the iron down lightly for a couple of seconds. Don’t slide it around, or the flowers might mess up.
Wait for the flowers to cool before checking them. This step helps the petals keep their shape and color. If they’re not flat enough, you can iron them again.
Remember, ironing flowers might wrinkle them. This happens because of the heat. This way is good when you need a fast way to press flowers. But, for the best-looking flowers, use a flower press or a book.
Ironing flowers is quick but might not keep them as well as other methods. Still, with care, you can get nice pressed flowers. Enjoy the beauty of your pressing efforts.
The Best Way to Press Flowers
When pressing flowers, choosing the right method is key for the best results. Your choice depends on what you like and how much time you have. We’ll look at various methods to help you find the best way.
Book Pressing Method
The book pressing method is classic and effective. It’s ideal for those who love simple, old-fashioned ways. To press flowers, use a heavy book and paper that absorbs, like parchment or blotting paper. Place flowers between the paper with space between each one. Then, put a weight on the book. Flowers will dry in 2 to 4 weeks. Remember to check and change the paper often if needed.
Homemade or Store-Bought Flower Press
A flower press, either homemade or bought, offers even pressure. This tool is for those who press flowers often or want a custom look. You can make one with plywood or MDF, cardboard, and bolts by yourself. Or buy a ready-made press. It’s perfect if you like custom designs.
Microwave Flower Press
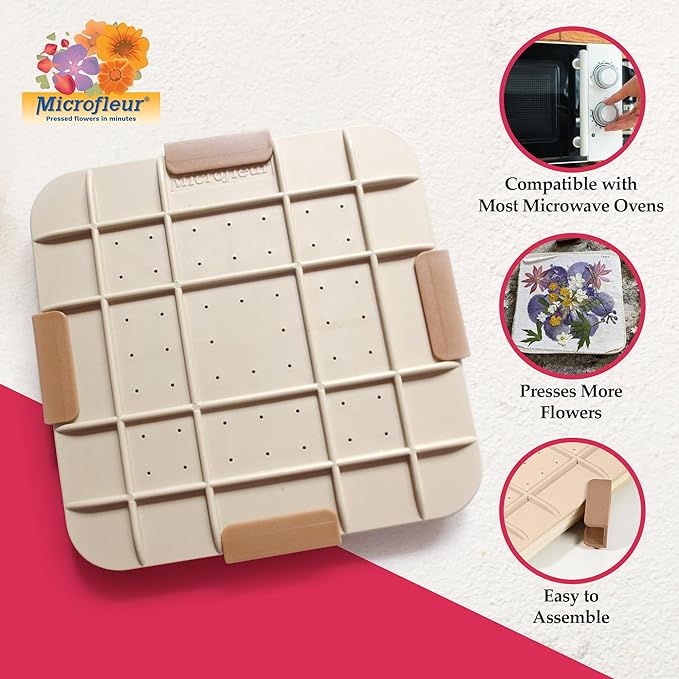
The microwave flower press is a fast option. You place flowers inside and microwave them in short bursts. Check the flowers’ dryness between bursts. This method turns weeks into minutes for drying. But be careful, the flowers can stick to the lining.
Ironing Flowers (Not Recommended)
Ironing flowers is quick but not advised. It can damage or wrinkle the petals, making them less attractive. Use this only when you really need a fast solution but don’t expect the best results.
Each method has good and bad points. Think about how much time you have, the results you want, and what tools you own. Pressing flowers is like an art. Choosing the right method for you will lead to gorgeous, long-lasting blooms.
What to Make with Dried Flowers
After pressing your flowers, numerous craft projects await. They add beauty to your DIY work. Let’s look at a few inspiring ideas:
1. Pressed Flower Art & Jewelry
You can make beautiful art from your pressed flowers. Put them in frames, resin or arrange them into collages. Use your creativity to craft something one-of-a-kind.
2. Greeting Cards
Bring nature to your greetings with pressed flowers. They make lovely designs on cardstock. These cards will stand out for any special event.
3. Bookmarks
Enhance your reading with pressed flower bookmarks. Laminate them to keep them safe. They’ll bring a little joy every time you read.
4. Wax Letter Seals
Give your letters a vintage look with wax seals and flowers. Place the flowers in wax then seal them. This addition will surely make an impact.
5. Home Décor
Use dried flowers to decorate your home naturally. Put them in vases or shadow boxes. They can also brighten up frames, holders, or your table’s centerpiece.
6. Keepsakes from Special Occasions
Create lasting keepsakes with pressed flowers. You can add them to scrapbooks, invites, baby notes, and more. These will hold the memory of special days beautifully.
Remember to handle pressed flowers gently. Secure them well with glue or tape. And don’t be afraid to get creative with them in your crafts.
Pressing flowers is a charming way to keep their beauty alive. There are several methods like using a book, DIY press, or even microwaving. Each way has its unique advantages.
Picking the right flowers and drying them well is key. We’ve given detailed steps for each method and useful tips. It’s important to choose fresh flowers without flaws for the best outcome.
Now, try your hand at pressing flowers at home. It takes a little care and patience. You can make stunning art, cards, and crafts. Keep your creations as timeless pieces of beauty.